BLM detection with Mask_RCNN
Table of Contents
I) Quick Start
Convert dataset (1/2)
# from blm-mask_rcnn/dataset_builder
python3 convert_via.py --input=via_dataset/ --output=mask_dataset/
Convert dataset (2/2)
# from blm-mask_rcnn/dataset_builder
mkdir tf_dataset
python3 convert_tf.py --label_map_path=label_map.pbtxt --data_dir=mask_dataset --output_dir=tf_dataset
Copy dataset
# from blm-mask_rcnn/dataset_builder
cp tf_dataset/* ../blm/data/
Train the network
# From tensorflow/models/research/
python3 object_detection/model_main.py \
--pipeline_config_path=/home/erosarin/blm-mask_rcnn/blm/models/model/mask_rcnn_resnet101.config \
--model_dir=/home/erosarin/blm-mask_rcnn/blm/models/modelV1 \
--num_train_steps=5000 \
--sample_1_of_n_eval_examples=10 \
--alsologtostderr
Supervise
# From blm-mask_rcnn/blm
tensorboard --logdir=models
Export the network
# From tensorflow/models/research/
python3 object_detection/export_inference_graph.py \
--input_type=image_tensor \
--pipeline_config_path=/home/erosarin/blm-mask_rcnn/blm/models/model/mask_rcnn_resnet101.config \
--trained_checkpoint_prefix /home/erosarin/blm-mask_rcnn/blm/models/modelV1/model.ckpt-5000 \
--output_directory /home/erosarin/blm-mask_rcnn/blm/models/inference_graph/
Evaluate / Process images
# From blm-mask_rcnn/blm/eval
python3 eval.py \
--inference_graph=../models/inference_graph/frozen_inference_graph.pb \
--labels=../data/label_map.pbtxt \
--output=output \
--input=../../dataset_builder/mask_dataset/images \
--max=5
II) Full steps and explanation
1 - Installation
Please follow the instructions on the Tensorflow : installation to install all the necessary modules.
2 - Dataset generation
IMPORTANT NOTE : tensorflow don't manage relative directory, use the path from root and don't forget to change the username in command lines
To create the dataset, we used VGG Image Annotator (VIA), it is a very powerfull and fast dataset creator.
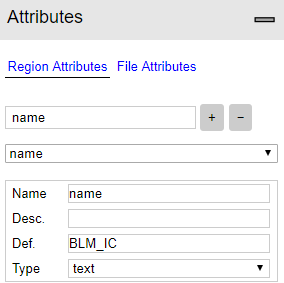
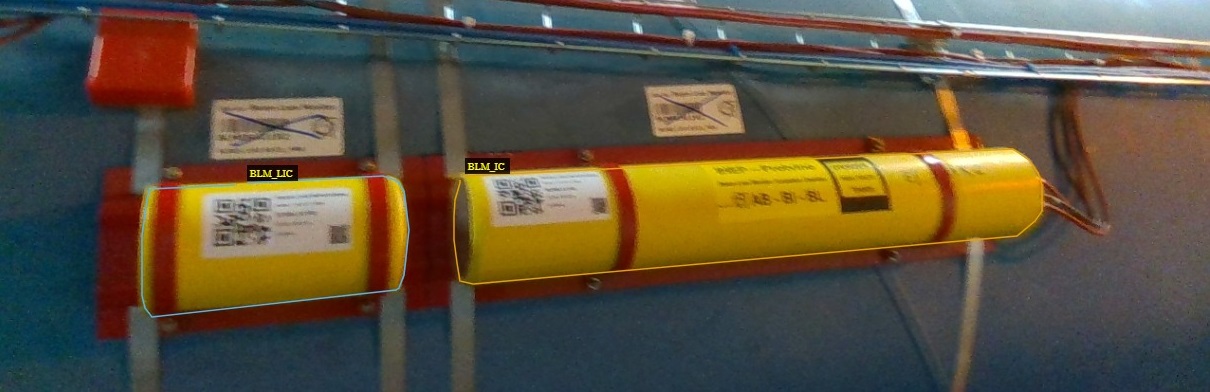
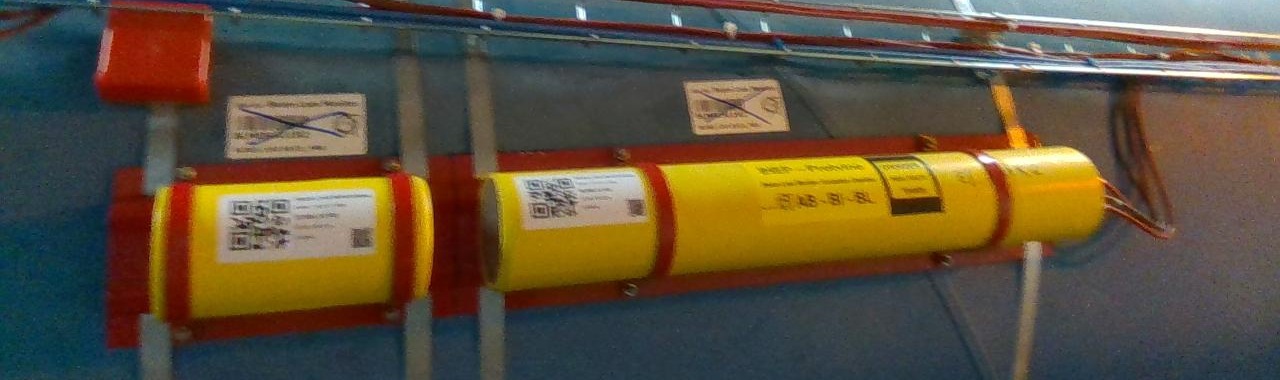
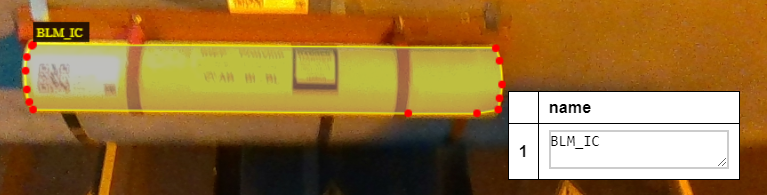
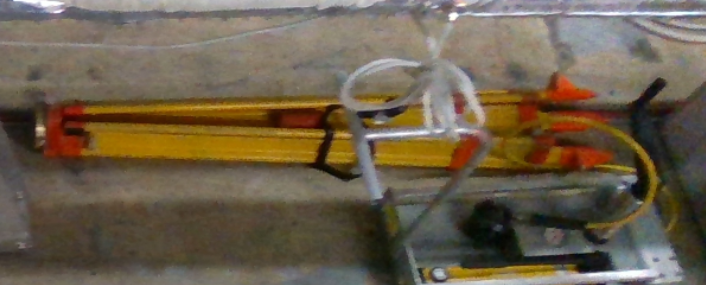
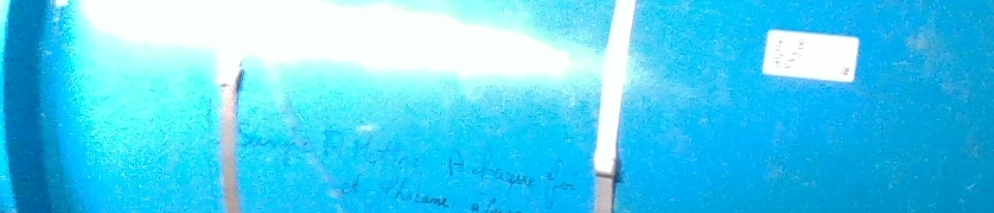
You need to create a region name like the one under and name each BLM you annotate with. Here we want to recognize the BLM_IC (the big BLM) and the BLM_LIC (the small one), see 3 pictures below on the labeling.
Create attribute (Left panel):
Change settings to see the name during labeling (Project -> Settings):

Label all your images (Home):
(For your information) It will create a json field like this for each annotation:
"region_attributes":{
    "name":"BLM_IC"
}
Once you finished to check the labels export annotations as json and put the file in the same directory as pictures
Recommended Directory Structure for dataset conversion :
blm-mask_rcnn/dataset_builder
??? convert_via.py
??? via_dataset
    ??? image_1.jpeg
    ??? ...
    ??? image_n.jpeg
    ??? via_region_data.json
3 - Dataset conversion to mask
To use the tensorflow dataset format, we need to generate masks from the regions you drawn with VGG, it also generate xml that contains object information and a trainval file to tell to tensorflow what images to use.
Convert dataset to masks:
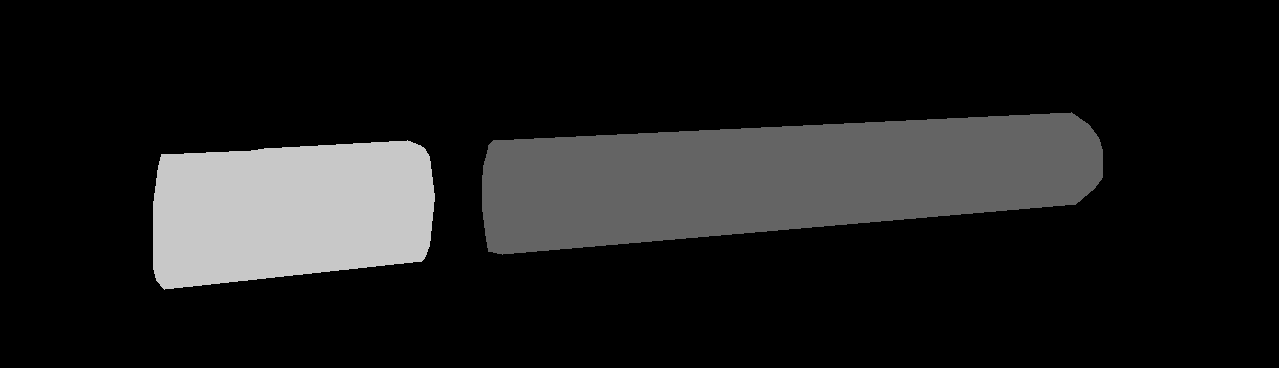
With the VIA annotation tool we created regions, now we have to convert it for the Mask_RCNN (mask below) and bounding box for the Faster_RCNN (xml below)
<annotation>
    <folder>images</folder>
    <filename>blm_94.jpeg</filename>
    <path>blm_94.jpeg</path>
    <source>
        <database>Unknown</database>
    </source>
    <size>
        <width>1280</width>
        <height>720</height>
        <depth>3</depth>
    </size>
    <segmented>0</segmented>
    <object>
        <name>BLM_IC</name>
        <pose>Unspecified</pose>
        <truncated>0</truncated>
        <difficult>0</difficult>
        <bndbox>
            <xmin>483</xmin>
            <ymin>464</ymin>
            <xmax>1103</xmax>
            <ymax>606</ymax>
        </bndbox>
    </object>
    <object>
        <name>BLM_LIC</name>
        <pose>Unspecified</pose>
        <truncated>0</truncated>
        <difficult>0</difficult>
        <bndbox>
            <xmin>154</xmin>
            <ymin>492</ymin>
            <xmax>435</xmax>
            <ymax>641</ymax>
        </bndbox>
    </object>
</annotation>
Run the mask generation :
# from blm-mask_rcnn/dataset_builder
python3 convert_via.py --input=via_dataset/ --output=mask_dataset/
After converting your dataset, the directory structure should look like this :
blm-mask_rcnn/dataset_builder
??? convert_via.py
??? mask_dataset
?   ??? annotations
?   ?   ??? trainval.txt
?   ?   ??? trimaps
?   ?   ?   ??? image_1.png
?   ?   ?   ??? ...
?   ?   ?   ??? image_n.png
?   ?   ??? xmls
?   ?       ??? image_1.xml
?   ?       ??? ...
?   ?       ??? image_n.xml
?   ??? images
?       ??? image_1.jpeg
?       ??? ...
?       ??? image_n.jpeg
??? via_dataset
    ??? image_1.jpeg
    ??? ...
    ??? image_n.jpeg
    ??? via_region_data.json
4 - Dataset conversion to tensorflow record
Create the label_map.pbtxt
item {
 id: 1
 name: 'BLM_IC'
}
item {
 id: 2
 name: 'BLM_LIC'
}
Convert the dataset to tensorflow format
# from blm-mask_rcnn/dataset_builder
mkdir tf_dataset
python3 convert_tf.py --label_map_path=label_map.pbtxt --data_dir=mask_dataset --output_dir=tf_dataset
5 - Prepare the training
Final Directory structure
blm-mask_rcnn/blm
??? data
?   ??? label_map.pbtxt
?   ??? train.record
?   ??? val.record
??? models
    ??? model
        ??? eval
        ??? mask_rcnn_resnet101.config
        ??? model.ckpt.data-00000-of-00001
        ??? model.ckpt.index
        ??? model.ckpt.meta
        ??? train
Prepair dataset
# from blm-mask_rcnn/dataset_builder
cp tf_dataset/* ../blm/data/
cp label_map.pbtxt ../blm/data/
Prepair pre-trained network
Go to Tensorflow : detection model zoo. Download the pre-trained metwork you want (here we use resnet) and copy the chekpoint files
# from blm-mask_rcnn/mask
wget http://download.tensorflow.org/models/object_detection/mask_rcnn_resnet101_atrous_coco_2018_01_28.tar.gz
tar -xzvf mask_rcnn_resnet101_atrous_coco_2018_01_28.tar.gz
cp mask_rcnn_resnet101_atrous_coco_2018_01_28/model.ckpt.* ../blm/models/model/
Configure the trainings settings
Copy the configuration file from samples and configure the path
# from blm-mask_rcnn/blm
cp ~/models/research/object_detection/samples/configs/mask_rcnn_resnet101_pets.config models/model/mask_rcnn_resnet101.config
# sed -i "s|PATH_TO_BE_CONFIGURED|/home/erosarin/blm-mask_rcnn/data|g" models/model/mask_rcnn_resnet101.config
Change theses lines models/model/mask_rcnn_resnet101.config to this : (configuring PATH_TO_BE_CONFIGURED and PNG_MASKS)
#line 121
fine_tune_checkpoint: "/home/erosarin/blm-mask_rcnn/blm/models/model/model.ckpt"
#line 135
train_input_reader: {
tf_record_input_reader {
input_path: "/home/erosarin/blm-mask_rcnn/blm/data/train_with_masks.record"
}
label_map_path: "/home/erosarin/blm-mask_rcnn/blm/data/label_map.pbtxt"
load_instance_masks: true
mask_type: PNG_MASKS
}
eval_config: {
metrics_set: "coco_mask_metrics"
num_examples: 1101
}
eval_input_reader: {
tf_record_input_reader {
input_path: "/home/erosarin/blm-mask_rcnn/blm/data/val_with_masks.record"
}
label_map_path: "/home/erosarin/blm-mask_rcnn/blm/data/label_map.pbtxt"
load_instance_masks: true
shuffle: false
mask_type: PNG_MASKS
num_readers: 1
}6 - Train the network
# From tensorflow/models/research/
python3 object_detection/model_main.py \
--pipeline_config_path=/home/erosarin/blm-mask_rcnn/blm/models/model/mask_rcnn_resnet101.config \
--model_dir=/home/erosarin/blm-mask_rcnn/blm/models/modelV1 \
--num_train_steps=5000 \
--sample_1_of_n_eval_examples=10 \
--alsologtostderr
Source : Tensorflow : Running Locally
7 - Supervise Training
# From blm-mask_rcnn/blm
tensorboard --logdir=models
Then, with your web browser and go to the link shown in the terminal
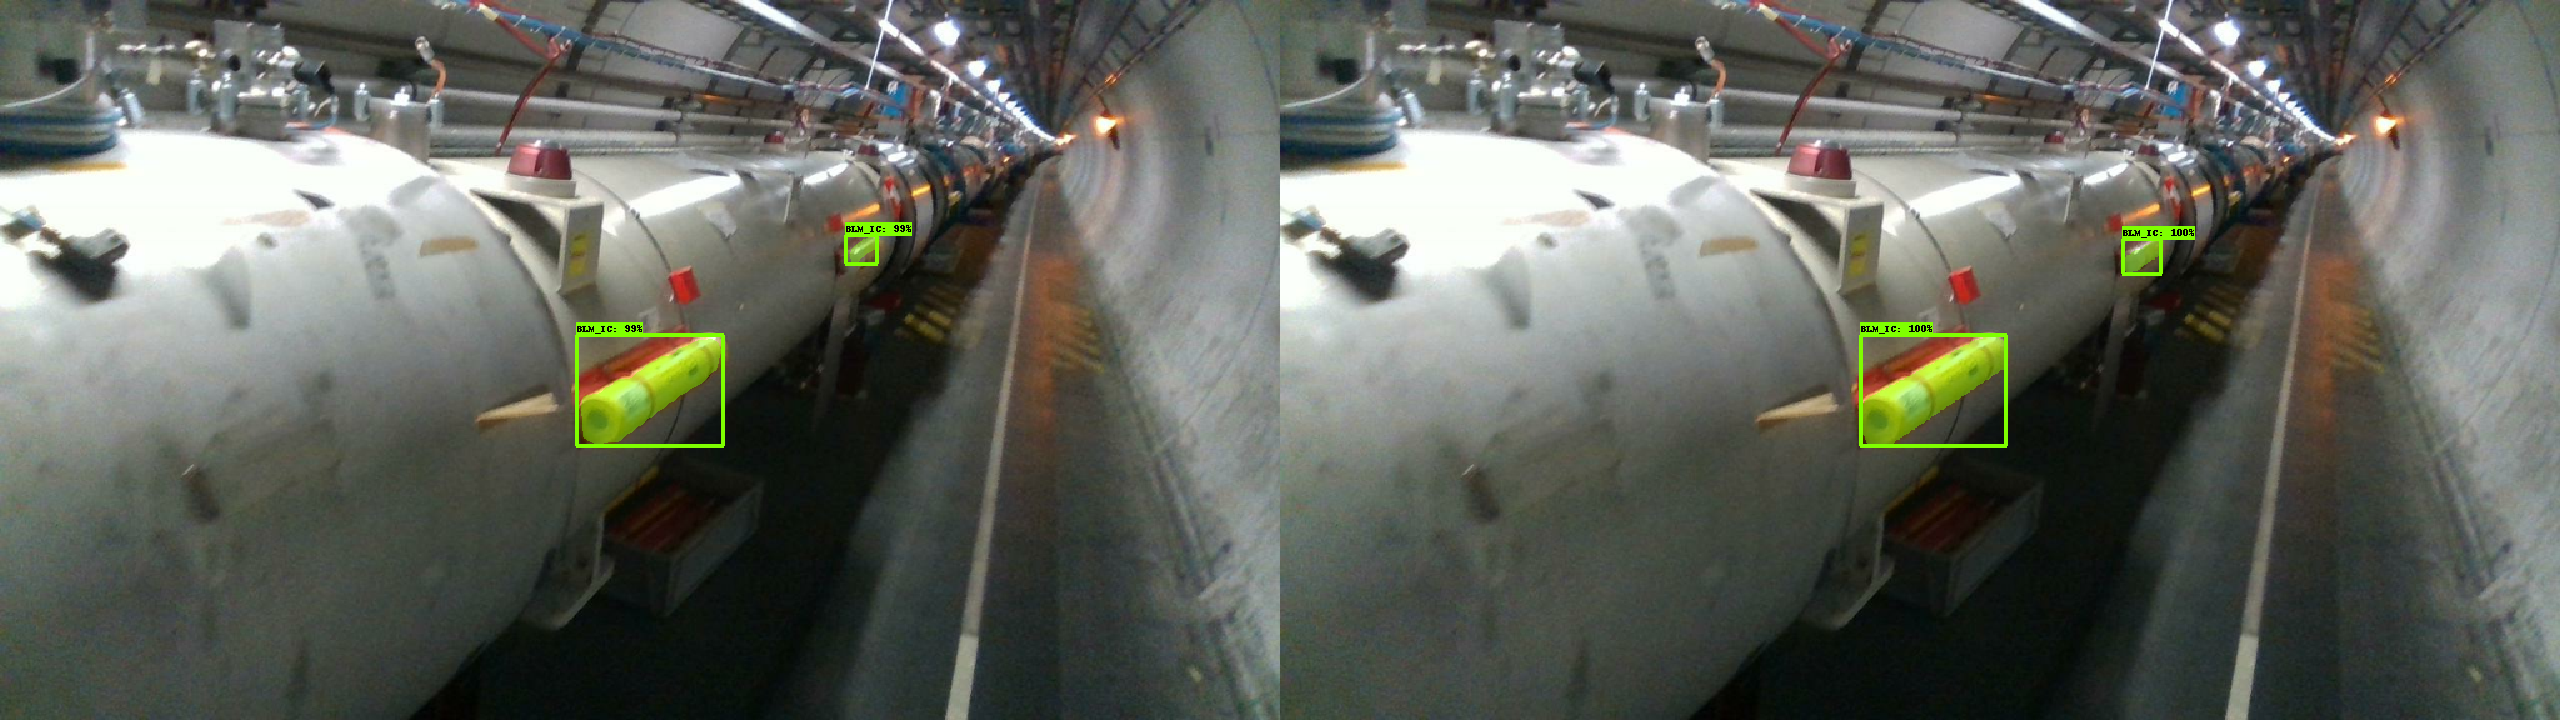
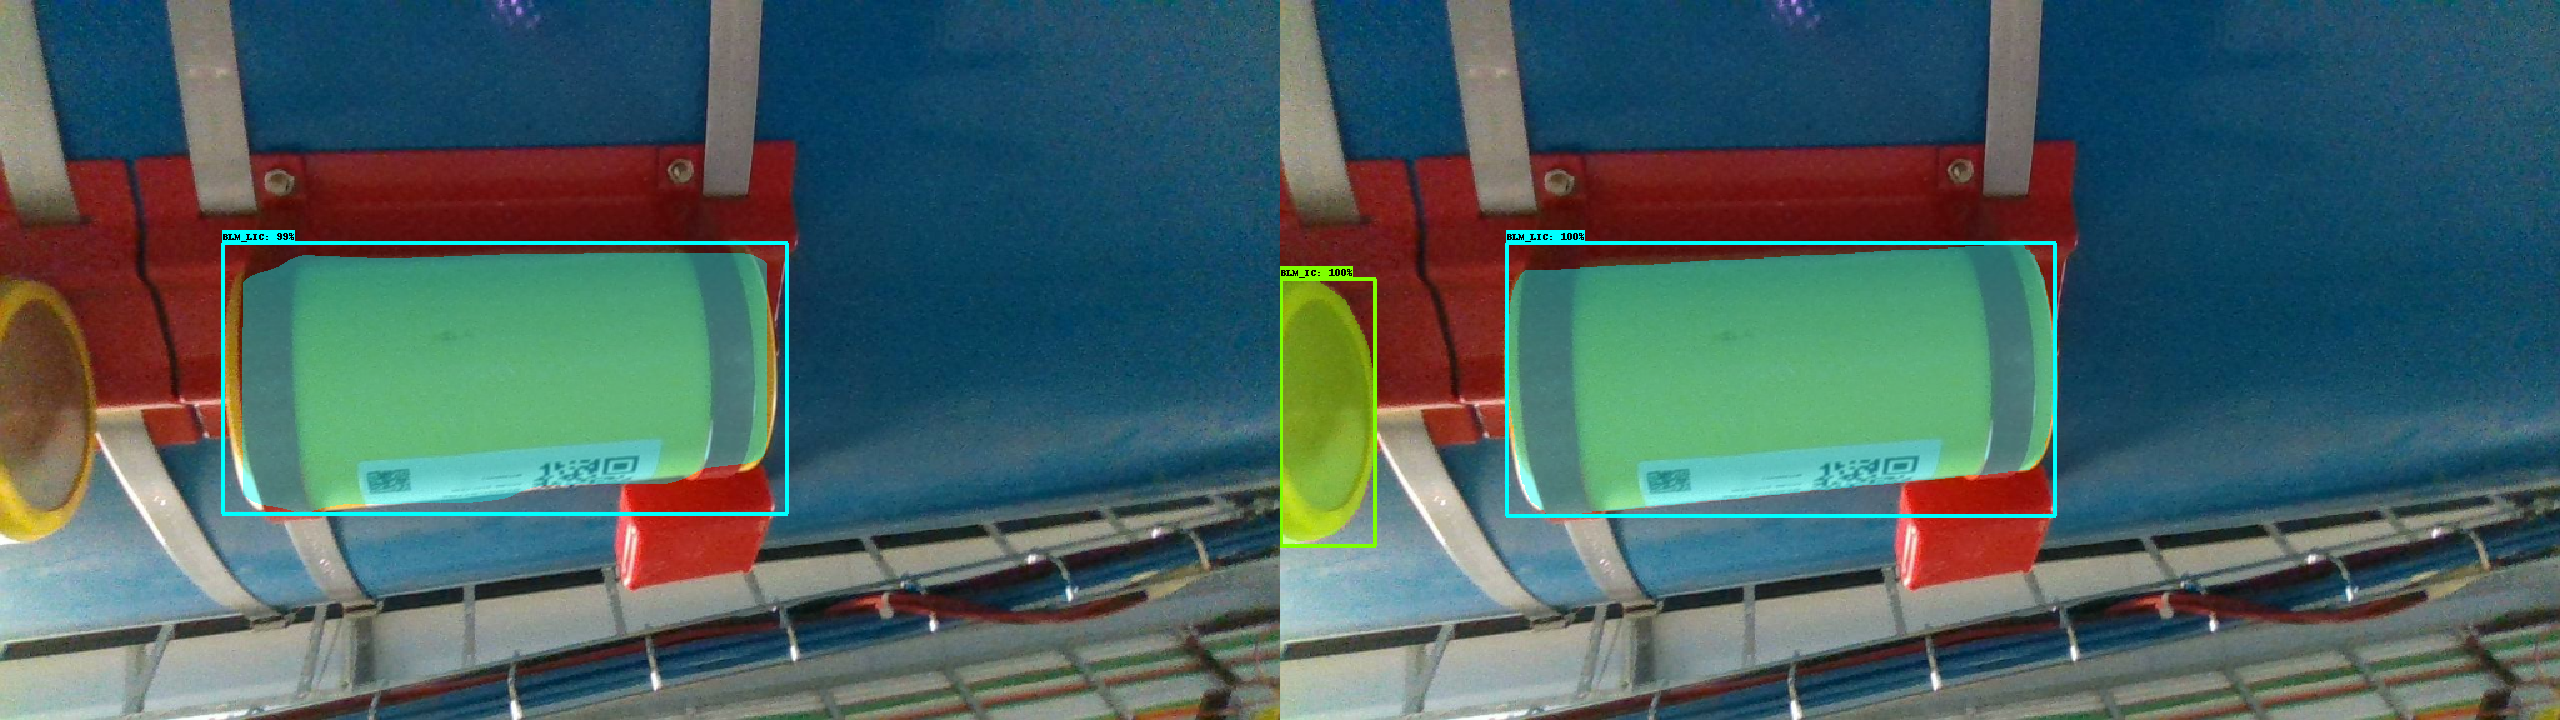
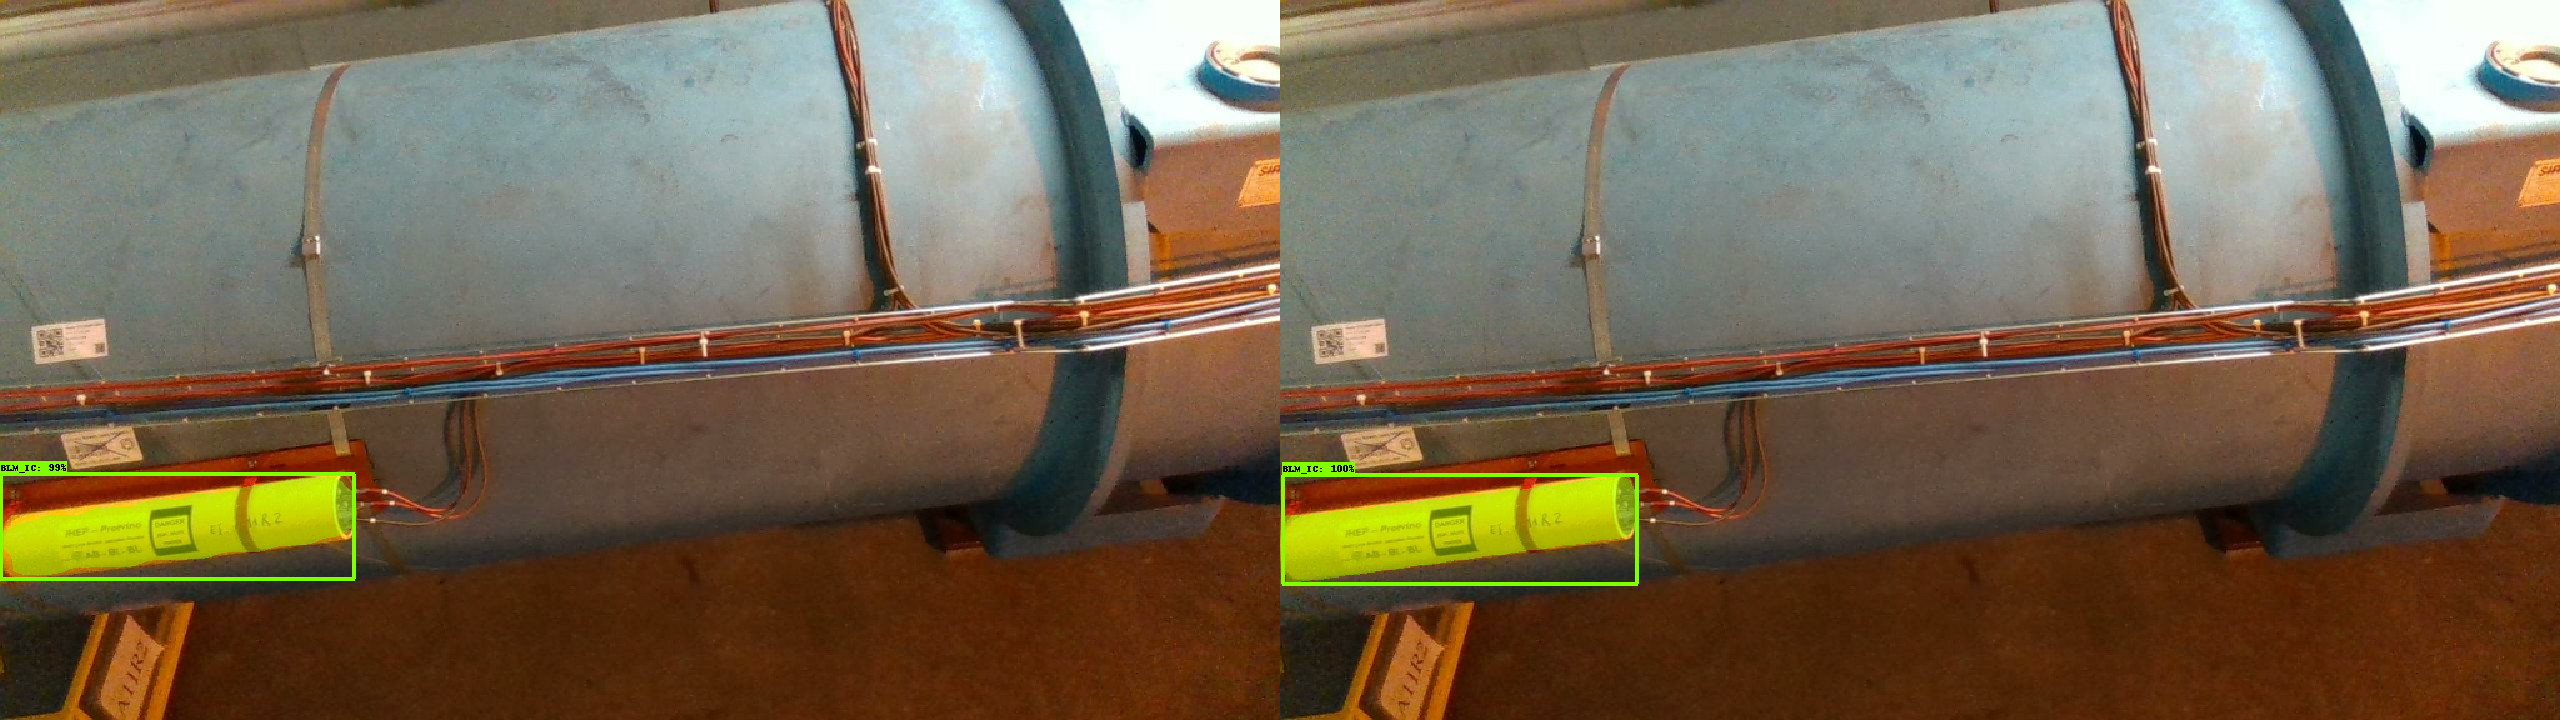
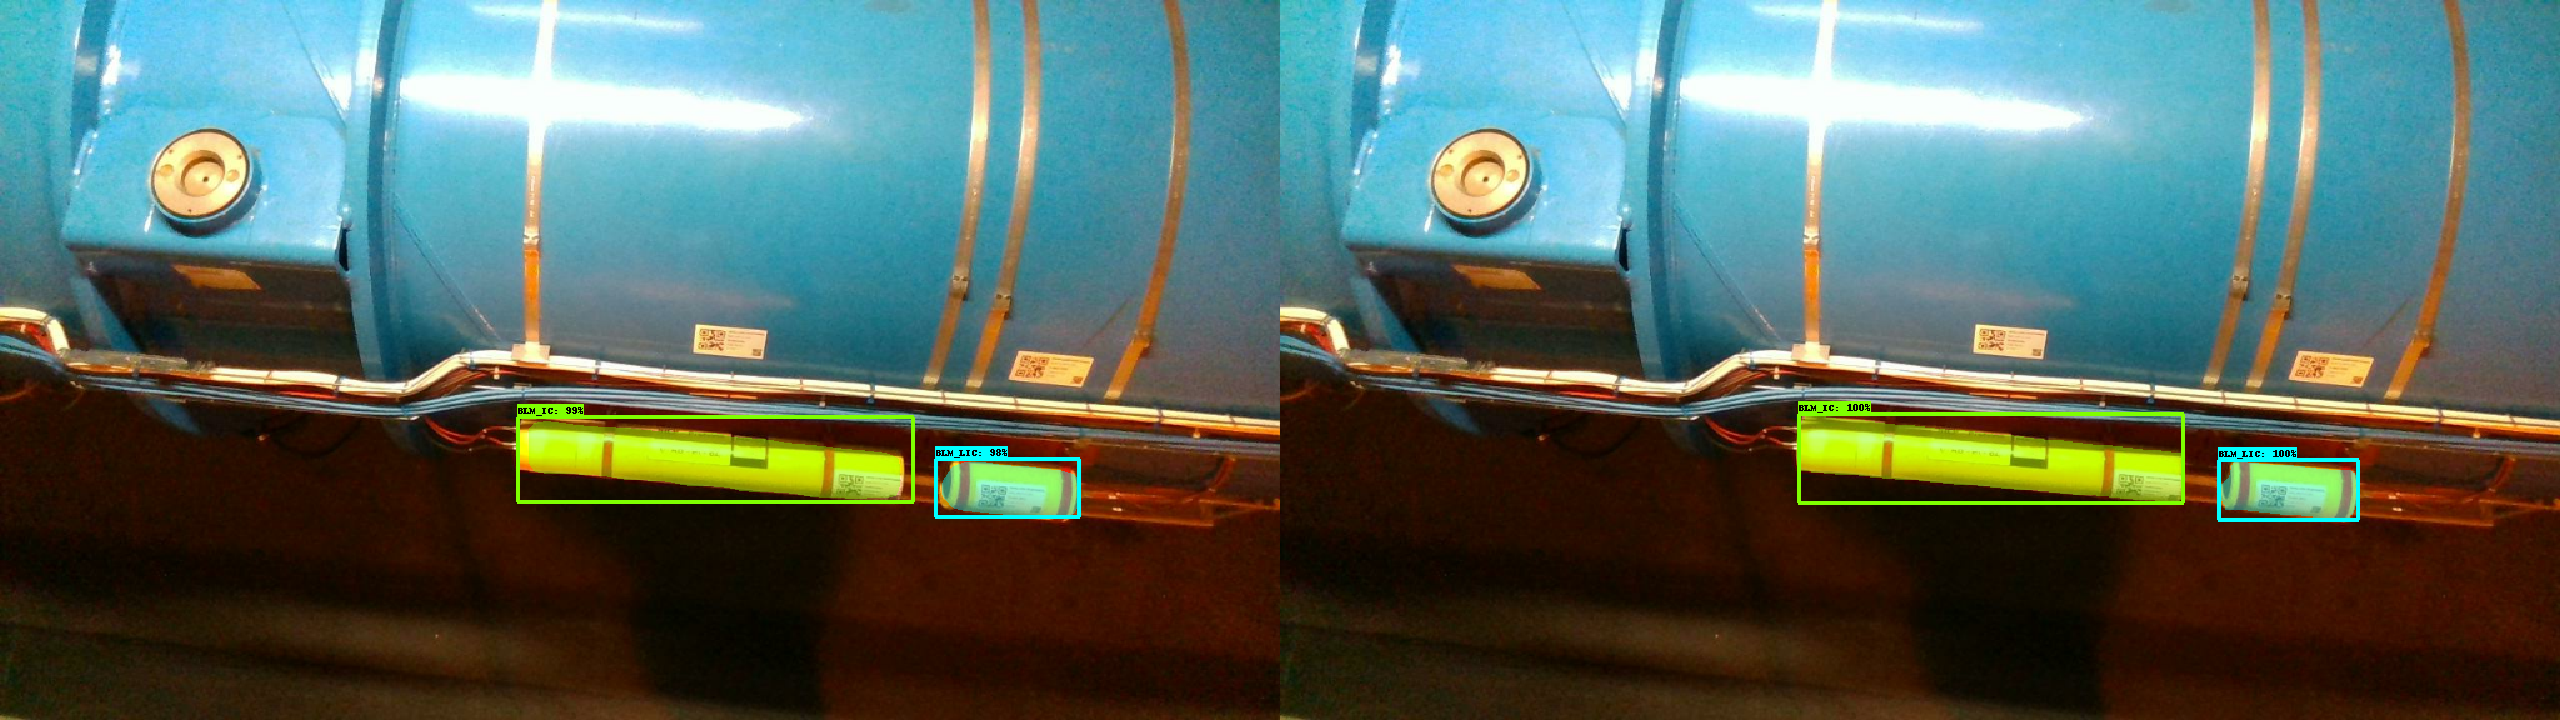
Left = predict / Right = excepted.
You can now compare what excepted and what you get from the mask-rcnn to improve your dataset or/and train settings.
8 - Export the network
# From tensorflow/models/research/
python3 object_detection/export_inference_graph.py \
--input_type=image_tensor \
--pipeline_config_path=/home/erosarin/blm-mask_rcnn/blm/models/model/mask_rcnn_resnet101.config \
--trained_checkpoint_prefix /home/erosarin/blm-mask_rcnn/blm/models/modelV1/model.ckpt-5000 \
--output_directory /home/erosarin/blm-mask_rcnn/blm/models/inference_graph/
9 - Evaluate / Process images
# From blm-mask_rcnn/blm/eval
python3 eval.py \
--inference_graph=../models/inference_graph/frozen_inference_graph.pb \
--labels=../data/label_map.pbtxt \
--output=output \
--input=../../dataset_builder/mask_dataset/images \
--max=5
This example will use the inference graph we just created, with the labels we used, to process 5 images from the mask_dataset, and save it to outuput.
Directory architecture after eval :
blm-mask_rcnn/blm/eval
??? eval.py
??? output
    ??? boxes
    ?   ??? blm_1.json
    ?   ??? ...
    ?   ??? blm_n.json
    ??? full
    ?   ??? blm_1.jpeg
    ?   ??? ...
    ?   ??? blm_n.jpeg
    ??? mask
    ?   ??? blm_1.jpeg
    ?   ??? ...
    ?   ??? blm_n.jpeg
    ??? original
        ??? blm_1.jpeg
        ??? ...
        ??? blm_n.jpeg
json boxes files format example:
[
   {
      "BLM_IC":[
         304.7421646118164,
         769.6310424804688,
         614.0319299697876,
         708.6765289306641
      ]
   }
   {
      "BLM_IC":[
         769.7421646118164,
         ...
         614.6765289306641
      ]
   }
   {
      "BLM_LIC":[
         30.7421646118164,
         ...
         70.6765289306641
      ]
   }
]
10 - Improve your dataset (based on personnal experience)
After a lot of trainings I fount what gave me the best results :
-
Reduce mouse sentitivity to be as precise as possible (it is better to be slow but precise to do the datasets only once)
-
Select the whole BLM with the red attach (helps to differenciate both BLMs)
-
On blurred images, cut out a bit inside (it is better not to have external elements)
- Put non related BLM photos (that can look like)
- Change of environement (lab / LHC tunnel) or you will have surprises
- It is better to put the refletion in the labeling but don't forget to put orther random reflections (even light sources)
- Don't put elements over the BLM in the labeling (wires ...)
- Don't put the red support in the labeling

Bonus :
If you respected all the conditions, I advice you to make an evaluation of all pictures you have to see where there is mistakes, when you found some add it in the dataset. (We learn from mistakes we made ?)
III) Connect with cpp
In C++ there is a way to call python functions, what we want to do is call the "open" function in ObjectDetection to initialize the frozen graph and all the necessary nodules. Then, we call "get_bounding_boxes" each time we want to process an image to get the mask.
# blm-mask_rcnn/blm/eval/ObjectDetection.py
class ObjectDetection:
    def open(self):
        ## open code
        return True

    def get_bounding_boxes(self,image):
        ## get_bounding_boxes code
        return mask
Include the necessary libraries
First, we need to initialize Python.h and numpy (arrayobject.h), so we will be able to send images as parameter to python functions
#include <Python.h>

#include <arrayobject.h>
Initialization
Py_Initialize();

// this macro is defined be NumPy and must be included
import_array1(-1);
Setup python file
You can find the documentation here for the functions.
// setup file
PyObject* module = PyImport_ImportModule("eval");
assert(module != NULL);
Setup python class
// setup class
PyObject* MyPyClass = PyObject_GetAttrString(module, "ObjectDetection");
assert(MyPyClass != NULL);
Setup python class instance
To access to the class, we need to create an instance, it will allow to call class methods and use 'self'
Note : you can only read self, if you want to write on it use the class name (self.value ==> ObjectDetection.value)
// setup class instance
PyObject* myClassInstance = PyInstanceMethod_New(MyPyClass);
assert(myClassInstance != NULL);
Call the open function
You can find the documentation here for the arguments.
// call the open method in ObjectDetection class with self as parameter, type object "O"
PyObject* result2 = PyObject_CallMethod(myClassInstance, "open", "O", myClassInstance);
assert(result2 != NULL);
Convert the image to PyObject
We use openCV to read the image, the fornat is Mat, but it is not possible to put this format as parameter, so we created this function to get the PyObject from the mat.
PyObject* matToPython(Mat image) {

    // total number of elements (here it's an RGB image)
    int nElem = image.rows * image.cols * 3;

    // create an array of apropriate datatype
    uchar* m = new uchar[nElem];

    // copy the data from the cv::Mat object into the array
    std::memcpy(m, image.data, nElem * sizeof(uchar));

    // the dimensions of the matrix
    npy_intp mdim[] = { image.rows, image.cols, 3 };

    // convert the cv::Mat to numpy.array
    return PyArray_SimpleNewFromData(3, mdim, NPY_UINT8, (void*) m);
}
Call the get_bounding_boxes function
// call the get_bounding_boxes method in ObjectDetection class with self and the image as parameter,
// both are object type, so "O" and "O"
PyObject* resultGet = PyObject_CallMethod(myClassInstance, "get_bounding_boxes", "OO", myClassInstance, imagep);
assert(resultGet != NULL);
Convert the image to Mat
Once we get the result, we need to convert it to get the image, there is 2 images format possible, when the image's dimension is 3, we have RGB, when it's 2, we have grayscale.
Mat matFromPython(PyObject* result) {

    Mat out;

    if (!result) {
        cout << "No result" << endl;
        return out;
    }

    if (!PyArray_Check(result)) {
        cout << "Result is not an array" << endl;
        return out;
    }

    PyArrayObject *np_ret = reinterpret_cast<PyArrayObject*>(result);

    if (PyArray_NDIM(np_ret) == 2) {
        Mat mat2(PyArray_DIM(np_ret, 0), PyArray_DIM(np_ret, 1), CV_8UC1, PyArray_DATA(np_ret));
        out = mat2;
    }
    else if (PyArray_NDIM(np_ret) == 3) {
        Mat mat2(PyArray_DIM(np_ret, 0), PyArray_DIM(np_ret, 1), CV_8UC3, PyArray_DATA(np_ret));
        out = mat2;
    }

    return out;
}
Build the C++
To build the program, we use g++, where we link python and opencv lib, plus, we add the path of the headers if needed
# From blm-mask_rcnn/blm/eval
g++ -o main main.cpp -lpython3.5m \
`pkg-config --libs opencv` \
-I /usr/include/python3.5/ \
-I /usr/local/lib/python3.5/dist-packages/numpy/core/include/numpy/
Run
You can run a quick example to process few images, here is the code of this example.
# From blm-mask_rcnn/blm/eval
sudo chmod +x main
./main
And Voilà, you have a C++ program able to get the mask for the image through python.